Tuesday, July 30, 2013

The Playroom Explained

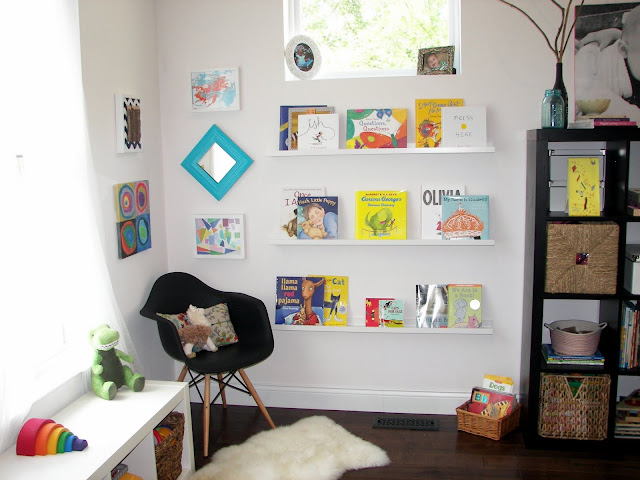
When I shared our playroom last week, I was in speedblogging mode. Had somewhere to be and had just enough time to upload the pics, size them, and add a little text. So, today I thought I would go into more detail. Specifically, I want to share my thinking behind the room and explain how the kids' things are organized. So, if you're like me and love details and organization then this post is for you. If not, get ready for a little too much information...


Creating a playspace for a five and one-year-old has been a serious challenge. I mean a HUGE challenge! So many of Audrey's toys contain small pieces that Will just can't have. I have done my best to make it work for both of them but I know, in the end, the older sister is getting the short end of the stick. In a perfect world, her things would be more accessible but accessible to her often means accessible to little brother. Things that he definitely can't get into like tiny doll accessories, small legos, puzzles with small pieces, etc. are being housed in Audrey's bedroom.

From the beginning, I knew I wanted the space to have more of a classroom feel. I have limited the number of battery-operated toys that we have in here. Don't worry! We still have them but I've chosen to keep them in the kids' bedrooms and in the basement. There are definitely toys in here but I wanted playtime to also be learning time. For that reason, I included a lot of things that would promote creativity, pretend play, problem solving, reading, writing, etc. With that said, here is what we have going on and how I chose to organize everything. I shared some of these things in this post but I'm definitely going into a lot more detail here.

Let's start with the large black shelf. I wanted the top to look pretty so I styled it with some decorative pieces and a large picture of the kids. I just love a candid shot and this was one of my favorites from our photo shoot last fall. Aren't they sweet and don't they look so smitten with each other?!?


One side got a chalkboard vase with branches, a vintage mason jar, some books that I love (it's driving me crazy that they're crooked in this picture), and a yellow bowl from TJ Maxx.


The other side is sporting a lantern that I stole from our dining area and that I decided to fill with crayons. I want to add more and I'm pretty sure I have a bag of gently used ones at school. The patterned box contains random writing utensils and art supplies.


The two top rows (where Will can't reach) contain craft/art supplies, magnetic wooden dolls, pattern blocks, tea sets, and a picnic basket. I've talked to Audrey about asking for things when she wants them or using a stool to reach them. I also try to remind her often what is up there if she hasn't asked for something in awhile.


The bottom two rows contain Audrey's sewing box (plastic needles are up higher), picture books, board books, Audrey's sight word blocks, Will's puzzles, and stacking cups.


The white shelf in the room contains more of Will's things; however, Audrey plays with the musical instruments and the blocks and wooden stackers on top. 


Also in the room, next to the shelf is a basket for Audrey to keep her letter and sight word books. I can see this being a place that I add different literacy activities throughout her year in Kindergarten.


And, in the center of the area rug is a basket of blocks that both kids love. I love walking in the room and seeing the structures that Audrey has built.


And, more than anything, I love seeing these two play together in their playroom.


Thanks for sticking around to get all of the details about our playroom. I am still planning to share how we DIYed all of the art in this room among other things. I've decided not to do a breakdown of where we got what (most of it is from Ikea) but if you're interested in a particular item let me know. Hope you enjoyed seeing our playroom up close and personal. What are, have been, or will be your must haves for a child's play area? I'm sure our playroom will change overtime as our kids grow and I would love to hear your insight. As always, thank you for following along.
 

Pin It

Friday, July 26, 2013

Playroom Reveal

**Update: If you would like to see more details about our playroom, please see my next post. Thanks!

I had one ultimate goal this week and that was to finish the playroom. So, I've been MIA with my posts because I've been trying to tackle projects while also celebrating a birthday, visiting our friends and their new baby, going to Kings Island (our local amusement park), and doing whatever else we can to savor these last few weeks of summer break.  I can't say that the room is 100% done because there are still little tweaks I'm sure that I will be making, as well as, one more big project that is still in the works (or at least in my brain). With that said, though, I think everything has come together enough for me to give you a look. So, enjoy the picture show below. I will give details about organizing this space and some of the projects that I did next week. If you see something that you are wondering about, let me know in the comment section below.


And, there you have it. I think I captured every angle. Do you like how I snuck in a couple of Will enjoying his space. His favorite thing to do is to knock everything on the ground. So, trust me, our playroom doesn't look like this for long. :  ) Happy Friday to you all! Pin It

Thursday, July 18, 2013

DIY Pencil Art

I don't know about you but I love art supplies. So much, in fact, that I decided to frame a set of colored pencils for our playroom. These colored pencils aren't your run of the mill variety, however. I found these cool tree branch pencils awhile back at TJ Maxx.

 
They were just so me and I couldn't pass them up. Then, I realized that they really aren't functional at all because, ummm, how do you sharpen them? I mean I guess I could take out a knife and whittle away but, yeah right, that's not happening. So, they've been looking pretty on our windowsill but now that Will is tall enough to reach the windowsill I needed a plan B. So, here's what my crazy brain dreamed up.

I gathered a frame that I had on hand, a roll of fun chevron gift wrap, and my glue gun.


I used the paper inside of the frame as a template to trace the gift wrap and I cut it out.

 
Then, I just started gluing and placing the pencils right onto the paper.

 
 Once they were all down and dry, I put the whole thing back into the frame and I had a brand new piece of art to hang on in our playroom.

 
I haven't actually hung it, yet, because I'm hoping to create a gallery of several pieces. In fact, Audrey and Will are both working on their contributions to the space. Slowly but surely, the playroom will get done and I can't wait to give you a full on reveal when that day happens. Pin It

Wednesday, July 17, 2013

We Have Art on the Walls People!


Aside from the art gallery in the playroom, our walls have been completely bare. Well, that all changed when I finally took the plunge and hung our wedding song canvas last week. It had only been on the floor, leaning up against the wall in the spot that I wanted it for like three weeks so it was really about time that it made a vertical move.


This is a DIY piece that I made for Aaron awhile back. You can read about how I made it here. I decided to put it at the end of the hallway and right outside our bedroom door. I don't know why I was dreading hanging it because it was so quick and painless. I used a little trick that I think I picked up from watching Sabrina Soto on The High Low Project. I gathered my necessary supplies which consisted of painter's tape, my go-to frame hooks, and a level (didn't think about the level until after I took this picture).

 
This canvas is hung by two sawtooth hangers -- one on each side. I always struggle to hang pieces like this and they usually always end up uneven. This little trick, however, is completely life-changing (at least for me). I started by turning the canvas over and putting a strip of tape over the sawtooth hangers. I made a mark on the tape where I wanted my hooks (or nails) to go.


My next step was to pull the tape off of the canvas and position it on the wall exactly where I wanted it to hang. I also took a second to make sure that the tape was level all the way across.


After that, I put the hooks into the wall on the marks that I made earlier on the tape. I peeled the tape off of the wall and hung our canvas. And, that was all she wrote people. How easy was that?


I even used my level just to double-check that I got it right. Looks pretty center to me. So, now we have made one very small step to making this place more homey and I have lost that feeling of dread that comes with hanging stuff on the walls. That's a good day in my book!


So, is anyone else gettin' stuff up on their walls? Any special tools that you use to help?
 
Also, did anyone else sign up for this Apartment Therapy Style Cure? I was definitely intrigued so I thought I would see what it was all about. My goal for the rest of week -- more stuff on the walls and checking out some new places to shop for vintage furniture. Local peeps, where are your favorite places to go?

Pin It

Friday, July 12, 2013

Mantle Look #1


I titled this post as such because I have a feeling that I'll play around with our mantle styling quite a bit. Not that I don't like the way it looks now but because I think it's fun to play around. Maybe I'll change it seasonally or just whenever the mood strikes. I have had this video of Emily Henderson bookmarked for ages because I love how she explains mantle styling. Unfortunately, none of her ideas include a big ol' flat screen hanging on the wall. I wish it weren't so but this really was the best place for it since we wanted our sectional to be directly across from our TV.


When Aaron first hung it, I thought it was way too high. I thought it should go just slightly above the mantle.Then, he pointed out that I would have more space to decorate and I have to say (although it pains me to do so) that he is right. So, here is the play-by-play of what I chose and why...

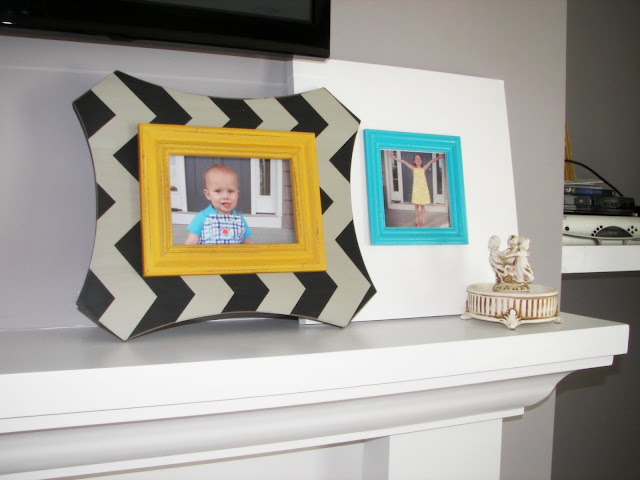
I knew I wanted some pictures of the kids up here. I love the idea of having photos that change seasonally and I just picked a couple of summer pics that I love. Will has his tongue out a lot in pictures and maybe I'm just partial but I think it is adorable. Audrey chose her picture herself. This was her reaction to the last day of school. My sentiments exactly! (Although I do miss my students and wonder what they've been up to.) The ceramic piece was another thing that was passed down to me from my grandma. I love mixing old and new things together. I think it's little unexpected, which is why I like it there.


I got both of the frames at Hobby Lobby. I think their frames are always 50% off! The white one was actually very different when I found it in the clearance section for $5. Here is what it looked like, at first. It was very cute but the orange was a little too bright for my taste and I couldn't handle the chevron frame layered on another chevron frame. So, I did what I had to do and I went at it with some spray paint. It just goes to show you that you can make anything work with spray paint!


Right in the  middle of the mantle, are a few of my favorite books by my favorite bloggers. How lucky was I that the colors tied in so well with the rest of the look? The thrifted wooden bowl is the twin sister of the other one that is now in our powder room. I thought the look needed something rustic and old because everything else is super modern looking.


And then, I added some living things. This could be dangerous for this poor plant but I hear succulents are error-proof. We shall see. I got the plant at Lowes and the tin planter at Ikea.


This annoyingly blurry picture (I'm so over my camera these days because it's definitely the camera and not me...) shows the other side of the mantle with a cluster of vases. The teal and yellow ones are from Ikea and the clear dotted one was a clearance find at TJ Maxx. I added some fresh flowers that a friend gave to me but I may also add some branches down the road.


So, there is our mantle in a nutshell. I have wild and crazy dreams of adding a frame over our TV with a two-way mirror. So, it looks like a mirror until you turn it on. How amazing would that be? Until then, I hope more people say what my cousin said when he walked into this room. "Oh, I didn't even notice the TV there. It blends right in." Nice!
So glad that I managed an extra post this week. I am going to try hard to keep this up! Have a wonderful weekend everyone!
Pin It
Related Posts Plugin for WordPress, Blogger...