Thursday, July 11, 2013

Our Living Room


Welcome to our living room reveal work in progress. This room is no where near being done but it is slowly coming together and I thought it was looking living room-ish enough to show it to you. As you can see, we've mounted our TV on the wall and I added some accessories to the mantle. I will share more on that in an upcoming post. We've also hung curtains and purchased a handful of larger items for this space. So, here we go! I'm putting a full resource list at the bottom in case you're wondering where we got what.


If the chair and pillow are looking familiar it's because we have the exact same look going on in our playroom. Both the chairs and pillows came in a set of two so I just decided to find a place for both of them. The basket that we're using as a little side table was my Grandma MaryLou's. I love having pieces of family history in our home.


Opposite the chair is our incredibly comfy couch. Seriously, this bad boy is dangerous. If I sit here for more than 20 minutes (which never happens when Will is up and about) I am out like a light. I went back and forth for a very long time on whether or not to purchase this without seeing it in person. It is by Ashley Furniture but nobody had it in stock in our area. Even the first day it arrived I wasn't too sure about it. The fabric color and texture wasn't what I expected and for half a second I considered sending it back. Fast forward two months and I'm so glad that I didn't. In addition to the comfort level, the color actually ties in really well with everything else in the room.


I swapped out the matchy, matchy pillows that it came with for these. I am still looking for a couple more to add. What can I say? I love pillows! They are such an easy way to bring in color and pattern. Oh, and do you like my little tray?


This was a $5 thrift store find that I couldn't pass up. It may have had a very close encounter with a spray paint can the other day but I hesitated. I decided that I may just like it, as is. It's warm and distressed but not because someone took some sandpaper to it but because it's old and is showing its age. There is something about that, that I really love. What do you think? Update or leave as-is? I don't foresee it being on the couch for long. We want to get a large storage ottoman and I see it going on top of it. In the meantime, though, it has been the perfect spot for my laptop while I write my posts!


Here is the full view of the room from our entryway. I know the picture is dark but I was loving the way the late, afternoon light was coming in and showing off our rug.  We are loving it, by the way. I also like the look of our new curtains but I am hating the way we hung them. I am going to get longer rods so that the curtains can be pulled completely off to the side of windows. Why have them if they are always going to be covered up, right? Don't worry, I'm sure I'll show you when we get around to doing it.
 
 
I am still looking for a budget-friendly navy chair like the one in my original mood board  along with several other accents.
Living Room Take 2
Aaron is  in the process of building shelves for the nooks next to the fireplace. You may have noticed in one of the above pictures that he has one shelf done. Yay! Maybe we'll have another one by the end of the weekend. Although it is a work in progress, we love relaxing in this space. Especially since all four of us can fit on our couch at the same time quite perfectly.
 
So, what's next? Well, I want to show you the entire playroom very soon and I just ordered a rug for our library space. I am so excited to start on that room! Oh, and here is where we got everything just in case you care...
 
 
Gray sectional - Ashley Furniture
Black armchair (link shows white) - Overstock
Area Rug - Rug Studio
Turquoise chevron pillow cover - Hobby Lobby
Small pillow (on black chair) - HomeGoods
Other pieces either thrifted or handed down.
 
* I'll share the details of the mantle items soon!
 

Pin It

Tuesday, July 9, 2013

Stenciled Table & A Look at the Powder Room

Way back when the building process was still in the very beginning stages, I thought I would get a jump start on some projects for our new home. One such project was my little oak table redo. Let me remind you what it looked like untouched and after I got my DIY hands on it.

Before...

`
 
 
After...

 
It turns out that after a whole year went by I wasn't really feeling the look of the table anymore. I can definitely tell you that my style has evolved in the past year. It's actually kind of hilarious to read the original post (linked above) and think about how much my thinking has changed. The idea of using this in the powder room remained the same but I decided it was time to bust out my scraper and get rid of that scrapbook paper. Once I did that I realized that it really needed a fresh coat of paint. I stuck with white but for an extra little something I decided to stencil the top with gold dots. My stencil isn't very big, as you can see, so I did one side at a time.


I covered all of the areas that I didn't want the gold paint to get on. And, yes, I used my West Elm catalogue. I was tired of looking and longing for all their amazing things that I can't have.


I can't remember the brand of paint that I used but I did use a metallic gold spray paint. It would have been easier to just use some craft paint and brush it on but I didn't have any on hand. I tend to work harder and not smarter. Oh, well! Here is the final result all styled and looking pretty in our powder room. It looks a little more sophisticated now, don't you think?


I styled her with a ceramic owl that I found in the clearance section of TJ Maxx, an Island Mango candle from Target, and a thrift store wooden bowl on top.


Underneath, I filled this metal tin that I picked up at Hobby Lobby with magazines and TP.


It's feeling quite at home in the corner of our little bathroom.


Here's a quick view of the other side of the room. There isn't too much going on in here, as you can see. Of course, the walls are in need of something but I also have a plan for making that builder grade mirror look a little more chic.


Glad you stopped by! Did you notice something different about the blog today? I did a little revamp by adding categories at the top and doing a couple of other updates. Hopefully, it helps you find things you're looking for a little easier. Happy browsing!

  
Pin It

Saturday, July 6, 2013

How To Make a No-Sew Curtain

Earlier this week I showed you our master bathroom and what we've done in there, so far. I thought I would elaborate a little on how I made the curtain for our big picture window in front of the tub.
 
 
The process was pretty simple and required absolutely no sewing! I feel a little bad for my sewing machine. He hasn't made an appearance in quite some time. Maybe I need to dust him off before I forget how to thread the bobbin, again!
 
I actually had a hard time finding fabric  that I liked. I don't know why but nothing was really speaking to me in the fabric store. Then, I stumbled across this shower curtain at Target that I liked. It was on sale and I decided it would be perfect for our bathroom window. Plus, I like it enough that I knew I could use any leftover fabric for other projects.


The first thing I did to transform it from a shower curtain to two window panels was to cut it right down the middle. Then, I measured how long I wanted it to be and added about an inch and a half to make room for the faux seams. I cut both of my panels to this length and then it was time to break out my iron and ironing board.
 
I used Heat n' Bond Ultra Hold iron-on adhesive that I got from the fabric store.


I started with the side seam. I ironed down the seam to equal the size of the pre-sewn seam on the other side. Then, I inserted the adhesive between the two pieces of fabric and ironed it into place. This is one of those projects where I forgot to take a lot of pictures. Probably because my hands were so busy ironing. Where is my photographer when I need him? Here is what I can show you. If you look closely at this horribly, blurry picture (my camera does not know what to do up close) you can see how the adhesive fits under the pressed seam.


I repeated this step for all of the seams that had been cut until there were not more rough edges. I made sure to keep the seams equal in size on both panels.
 
 
I picked up a tension rod and some curtain clips at the hardware store to hang the curtain. I was lucky enough to find a tension rod that was strong enough to hold the weight of the curtain and small enough for the clips to fit over it. I just spaced the curtain clips out evenly, attached them by pinching the fabric an inch or two below the top of the panel, and then slid the curtain clips on the rod. I hung the rod and I called this project complete.  
 
 
Our curtain has worked out quite nicely, so far. I love that we still get lots of light in here and that our lovely picture window is still a focal point in the room. I don't think that would have been the case if we had hung blinds or had we hung the curtains from the top of the window. Do you agree?
 
 
Thanks for taking the time of your weekend to visit. I will see you next week with a look at our powder room and some updates with what I've been doing in our living room!  
 

Pin It

Wednesday, July 3, 2013

Getting Festive for the 4th of July


Nothing says summer like the 4th of July. This holiday is a big deal around here. Every year, my mother and father-in-law have a party complete with the best firework show in town (I may be biased but its true). My two cuties are all ready to celebrate. We begin our celebration the day before in case you were wondering why I have them dressed a day in advance. Don't you just love Will's expression? I have to act like a complete fool to get both of my kids to look at the camera and smile. Well, it works for Audrey and Will gives me a look like "Who are you and what did you do with my mom?"Can we talk about their shirts, please? Cute, huh? I wish I could take credit for them but I can not. A good friend snatched this idea from Pinterest and let my kids join in the fun the last time we were at their house. It's so simple! Just use fabric paint to do your child's handprint and paint some stripes (don't count my stripes b/c I wasn't keeping track). So festive!

 
And, it wouldn't be a 4th of July party with out some amazing summer dishes. I decided this year that I wanted to try some new things so I scoured my recipe pin board and this is what I came up with. I linked the recipe for each one if you want to give it a try.
 
Lemonade Cake
 
This looks and smells amazing. I haven't actually tried it, yet, other than to sample the batter so I can't speak to the tastiness. I'll have to let you know...
 
Recipe can be found at http://www.bhg.com/recipe/lemonade-cake/


Tortellini Pasta Salad

I usually always make a pasta salad but I thought this would be a nice change of pace for me. I used fresh mozzarella for the the cheese. I did test this one and it is very good. My usual dressing calls for sugar so I'm missing the sweetness but it's nice to have something different (plus, it's probably healthier).


Recipe can be found at http://www.peasandcrayons.com/2013/03/tortellini-pasta-salad.html
 
Strawberry Kabobs
 
This is by far my favorite and it was the simplest. I opted to use popsicle sticks rather than skewers to make these a little more kid-friendly and to make smaller portions. Audrey lended a hand with these bad boys. We drizzled them with melted white chocolate and used blue sprinkles to make them patriotic. They are amazing!
 
 
Recipe can be found at http://onederlandorbust.net/2013/05/13/strawberry-shortcake-kabobs/


I hope that you all have a safe and wonderful holiday! Pin It

Tuesday, July 2, 2013

Pattern Play in the Master Bathroom

Shopping for our new home has been like a second job for me over the past several weeks. That's okay, though, because I do love to shop! For the master bathroom, I just started picking things up here and there when I was out and about that I thought would work well. Let's take a quick peek, shall we...


We are really liking the paint color. It's Watery by Sherwin Williams and it definitely gives that calm, serene feeling that a bathroom should have. For that reason, I didn't want to bring in anything too brightly colored in the way of accessories. I decided to just decorate with neutrals. Somewhere along the line I learned the important lesson about mixing neutrals. All neutrals can go together. So, I decided to use brown and gray for this room and to add in some interest with pattern.

One of the first things that I did was make this curtain. I love the window but we needed some privacy. I decided to make it a cafe curtain so that the light could still come in while also giving us the privacy we needed in here. I'll show you how I went about making this no-sew curtain in another post.


His and her vanities also called for some his and her hand towels. My floral one is from Home Goods and Aaron's chevron towel came from TJ Maxx.


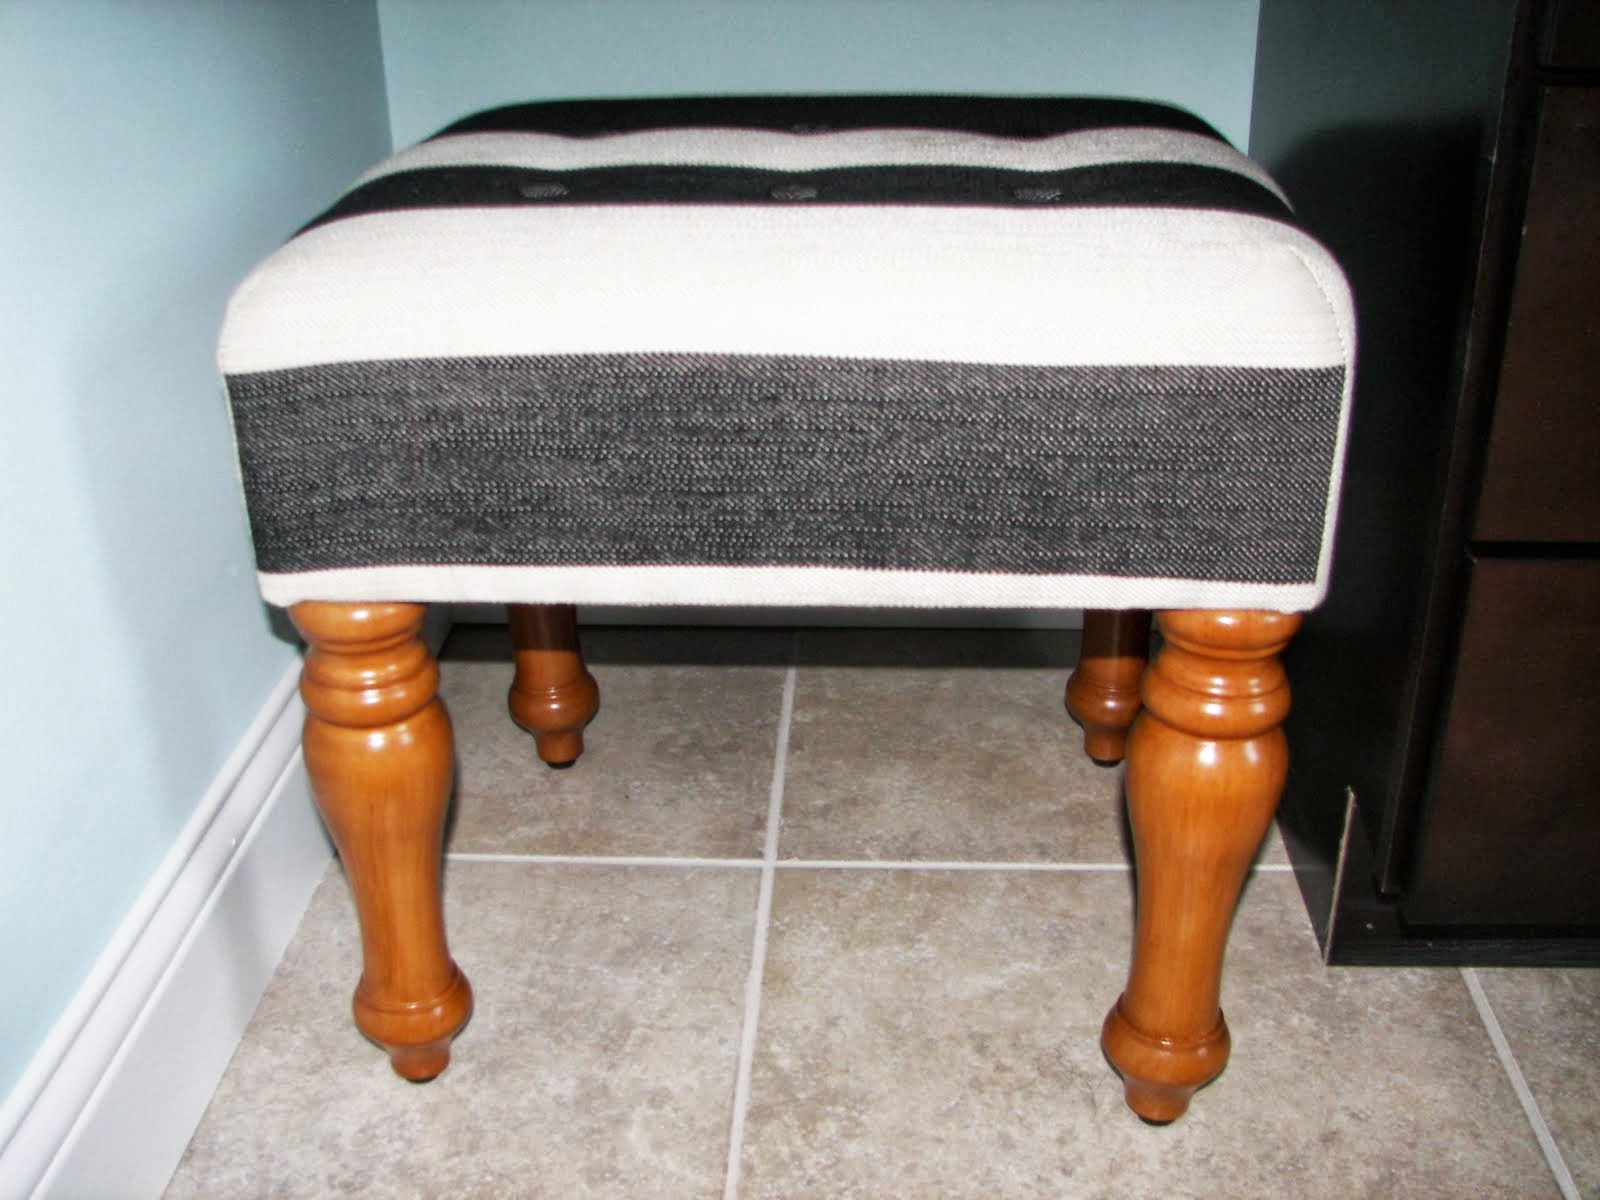
Also, for my side, I added this gray and white striped stool.

 
We needed a clothes hamper in here and I had to have this fun basket from Home Goods. If you can't tell, it has a white and gray stripe going through it.


Now for some brown...
 
I picked up this chevron rug at Home Goods (can you figure out my favorite places to shop for home decor?). It sits in front of the bathtub. I found some super cute Nate Berkus towels at Target for the tub area, too.


I added the little pillow and a candle to this space, as well. Don't you just love the pillow? My friend Jenn gave it to me when I had Audrey and I thought this was the perfect spot for it. I've only been in time-out a couple of times since we moved in but I'm hoping to go back very soon. : )


Now, for fun, let's take a closer look at all the patterns going on in this room.


I love that everything isn't the same and matchy-matchy but that everything still goes together because of the neutral colors. What do you think?
 
 
As with pretty much every room in my house, I still want to add some things to the walls in here. And, I'm working on a place to store my jewelry by my vanity so consider that to be "coming soon".
 
Thanks for stopping by. If all goes well, I will be back tomorrow with some fun summer recipes and a kid's craft for the 4th of July. Yeah for summer! 


Pin It

Tuesday, June 25, 2013

Art on Display


Well, folks, the books on display in our playroom now have a new companion. Say hello to our art gallery! This was a must have for our play space because Audrey loves to be an artist. Our refrigerator at our old house was always covered in her artwork. Since our new refrigerator is stainless steel and not magnetic, I wanted to give her (and Will too) a place to show off their work. And, I  definitely have Pinterest to thank for this awesome idea!


image via Maddie's Nest
 
I always look for frames when I'm at a thrift shop. All the ones that I found were under $2.00! And, I also used a couple that I had on hand so this project was definitely easy on the wallet. I wanted the artwork to stand out and wanted to keep the room looking fresh so I spray painted all of the frames white.


 A friend actually suggested this and I'm glad I took her advice. The white frames balance out the white book shelves that we already hung on the other side. See what I mean?


Once the frames were nice and dry, I attached a piece of wire on the back and sawtooth hangers if the frame didn't already have something to hang it from.


To create the gallery on the wall, I used an amazing trick that I saw on Young House Love. I used a giant piece of paper to plan out where the frames would go on the wall. Once I was happy with the arrangement, I traced the frames and put an x where the hooks/nails needed to go.


I taped the piece of paper to the wall and began inserting the hooks.


I used frame hooks which are great for when you don't have a stud.


Two of the frames were on a stud so I just used nails to hang them. Once all the hardware was in place, I tore the paper down and put the frames in place. Success and it was so easy!


All that was left to do was to add some artwork. I used small clothespins to hang the art from the wire.


I hung a few things Audrey had already made and I used a couple Instagram pics leftover from Will's birthday party for the small frames.

Finally, as soon as Audrey saw the art gallery on the wall she wanted to make something new. She did a self-portrait with oil pastels. I love it!


The art gallery is a perfect addition to the kids' space. I love that it keeps things looking tidy while also allowing Audrey to feel like a real artist.


Well, the playroom is nearing completion. I still want to add a chalkboard and some more things on the walls. I will be sure to share the details and post a big reveal once it is all done. It might take a little while because our living room definitely needs some serious attention right now so the playroom may be placed on the back burner for the time being.
 
Have you completed any Pinterest-inspired projects, lately? I would love to hear all about them.
 
Pin It
Related Posts Plugin for WordPress, Blogger...