Thursday, June 28, 2012

Frame Collage

Welcome to part two of my frame project. In my last post, I showed you how I painted some inexpensive wood plaques from Hobby Lobby that I planned to use as picture frames. Here's what I did once the paint dried...

I trimmed my pictures to be the correct size for each frame. Then, I used Mod Podge to attach them to my plaques. I put a layer on the back of the photo to adhere it to the wood. Then, I went over the front of the photo to seal and protect it. I know this sounds scary but I promise it works really well. Of course, it does mean that the photos are permanenaly attached to the frame but since I got my pics from Snapfish; I always have access to the same prints. I used a sponge brush to apply the Mod Podge. It goes on cloudy but don't worry, it does dry clear. Just look at this little sweetie!


I did this with all of my newly created wood frames and then decided that I needed a couple more frames to round out my collage. I already owned the blue frames (see below) so I decided to use them. They added some much needed texture to the overall look. Once everything was dry and ready to go, I had to figure out how I was going to get them up on my wall. I originally planned to attach wires or hooks to the frames but while I was at the store I came across these 3M Command strips for picture hanging. I have never used them before but thought it was worth a try as it would save me a little time and I wouldn't have to deal with the hassle of centering hooks and nailing holes.


Not to mention, my blue frames looked like this on the back and weren't originally made to hang on the wall.


I laid all of my pictures out on my table to plan out how I wanted the collage to look. Then I wiped down my wall and the back of the frames before attaching the strips.


Here is the finished product hanging in my living room! I will let you know how the strips work. I'm a little worried that I'm going to wake up tomorrow morning and find half of them on the ground. Aaron thinks I need more pictures and I completely agree with him. This is, at least the start to a collage that can grow over time and will be perfect for the entryway in our new home.


Pin It

Tuesday, June 26, 2012

DIY Frames

Recently, I put on my photographer hat and did Will's newborn pictures. Naturally, I used the opportunity to snap some pics of Audrey, too. I thought it would be fun to create a
collage of my favorite shots. I knew that I wanted to do a collage with separate frames but I was determined to find the most cost effective way to do that and headed off to Hobby Lobby for a little inspiration.

I quickly came across these wooden plaques. They were super inexpensive ranging from $0.89 to $2.99. While I was there, I picked up some craft paint and decided to take them home and see what I could create.


I just started painting. I loved the turqoise so I knew that I wanted that to be the most prominent piece. I also wanted a pop of yellow and decided to do the other ones white. I did two coats of the colored paint and three of the white. But then, I started thinking they looked a little sad. They needed a little something...

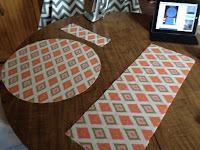
I also picked up some scrapbook paper at the store that day and was in love with this chevron pattern. I thought it would be a good way to add some visual interest to my collage. So, I pulled out the Mod Podge!


I trimmed my 12x12 paper down to 8x8 to cover the 6x6 frame. Trust me, I had no idea how this was going to turn out. I was, literally, just going with it and knew that if it was a disaster I was only out a couple of bucks.

My first step was to coat the back of the paper with Mod Podge. I chose to do this, rather than using spray adhesive, because I knew it would make it easier to work with the paper.


I began wrapping the wood like a present and folded the edges in like this. I added a little more Mod Podge during this step to the area I folded.


Once covered, I sealed the back by going over it with the Mod Podge. Thank goodness the back isn't going to show!


Once that dried, I did the same thing on the front. Here is the finished product. It turned it out better than I expected. The pattern may be slightly crooked but hopefully nobody can tell.


I also decided to paint part of this one black, again, to make it a little more interesting.


Here are my frames all hanging out together while they dry. Stay tuned to see how I added pictures to my frames and to see the finished product.

Pin It

Thursday, June 21, 2012

Sylist to the Dolls

This post is for all of you that have little girls who love dolls. Audrey has more dolls than one girl really needs but she absolutely loves them. She plays with them constantly and they usually end up looking like this...


Basically, they are a hot mess because of their hair. It drives me crazy! Brushing it is a pain  and usually creates a poof of static. So, I decided to do a little research on this topic and this is what I found out. First, you really need to use a wig brush or a brush especially made for doll's hair. I used this one that we got at American Girl. Of course, the people there insisted that it was the only brush that we should brush her hair with so I was suckered into spending the extra $8.00. Turns out, it was worth it. The metal bristles make a huge difference. 


My real secret weapon, however, is a spray solution that I made from water and fabric softener. Who knew? I filled a spray bottle with about 1 tablespoon of the softener and the rest water and gave it a good shake. It makes the hair so much easier to brush and amazingly doesn't make the hair yucky or greasy. Here are the girls again looking sleek and stylish.


Never again, will Audrey and I brush their hair without our new "magic" hair spray!
Pin It

Tuesday, June 19, 2012

A Little Fun in the Powder Room

I have become a little addicted to doing projects for the home. My hubby likes to make fun of me and conveniently remind me that our new house isn't even built yet. To me, that is a minor detail. It will be done one day and I intend to use this time that I have off work very wisely...

I've continued my compulsion by giving new life to this cute little table. We have been using it as a place to house our phone but we plan to use it in our new powder room. I want my powder room to have a fun, funky look. I feel like it's one of those places where you can experiment because it's a small space and easy to change.


I chose to paint the table white. I sanded it down a little, primed, and sprayed painted with a Rustoleum paint.


Once it was good and dry, I added some pieces of scrapbook paper to give it a little pop. I applied them with spray adhesive and then went over them with Mod Podge. Don't ask me why the bottom piece decided to wrinkle a little. Maybe it wasn't dry enough. I tend to be a little impatient with the drying process.


It's still cute and I plan to style it with a pretty candle, a framed picture, and perhaps a cylindrical glass case to hold extra toilet paper.

I'm excited to see it together with the mirror I did in my previous post and a bright, fun color on the walls.

Pin It

Pretty Words

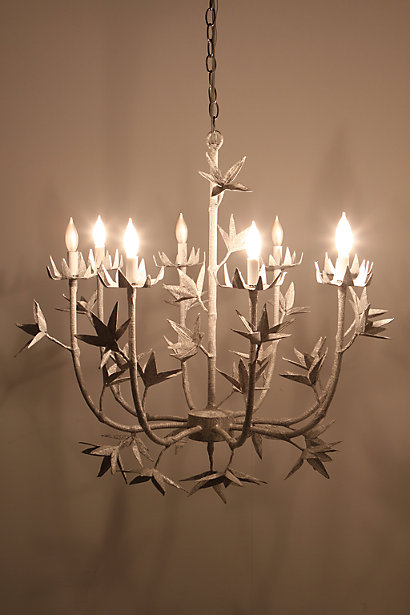
When it comes to inspiration for the home, you can't go wrong by browsing Anthropologie. Lately, I have been lusting after this gorgeous chandelier.


Check out the closeup view...


I love, love, love everything about it except for its $998 price tag. That is close to half of our entire lighting allowance for our new home. Nonetheless, I am inspired and one day I will attempt to recreate this piece. Until then, I thought I would practice the book page treatment on a mirror that I want to put in the powder room of the new place.


You may recognize this from my previous post about things in the home that need a face lift. I began by taking the glass out and wiping the whole thing down with a damp cloth.

I found this vintage book at a local used bookstore for a whopping 25 cents! The pages were slightly aged which is exactly the look that I wanted.


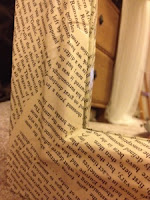
I pulled out the pages and cut them out, like so, to make the edges nice and pretty.


I then began attaching them to the frame with spray adhesive. I wasn't worried about it looking perfect. I alternated the direction of the print and overlapped the pages. Here it is with all the pages attached.


The next step was to brush the entire thing with Mod Podge.


Once dried, I put the glass back in and now she is ready to hang.


This was a super, fun project. I love books and words and now they will be displayed in a cool, funky way in our home. I am definitely going to keep my eyes open for the perfect vintage chandelier so that I can try it again!

Pin It

A Soft Place to Land

It seems that lately I have seen cute floor cushions aka poufs showing up everywhere. They have become the 21st century version of the beanbag chair and I knew that I had to have a couple for my kiddos. The problem is that they are super pricey. The cheapest I've seen them are at Target for $70. So, I decided to try my hand at making my own.

I was browsing one of my favorite blogs, Young House Love, when I came across a tutorial for floor cushions. Here is her link and this one that she used. She made it look so easy so I dusted off my Singer and got to work.

I purchased my fabric (1 yard per cushion) at Hobby Lobby for about $6/yard. I chose a canvas which seemed sturdy enough. I chose not use home decor fabric because it was much more pricey.

I started by making a pattern with copy paper. I drew a 17" circle with a compass and cut it out. Then, I made a rectangle for the side that was 9" by 51.5" and cut it in half. I had to do this because I used fabric that was 45" wide. I also needed a 3" by 12" piece for the handle.

I pinned my patterns to the fabric. I did my best to make sure that my two rectangles would line up when I sewed them together.


Once cut out, I sewed my rectangles together to make the large 9x51.5 piece. See how well I did with lining up the pattern?


Next, it was time to pin my piping onto the top side of both circles You will need two packs of piping that is 1/2 inch. I sewed the piping to the fabric by stitching on top of the piping seam. It is helpful to use thread that contrasts your fabric but I didn't.


Then, I pinned the piping to both sides of one of the handle pieces and sewed them on the same way.


I took the other handle piece and put the top side down on the first piece. I followed my first stitch and sewed them together. It was then time to turn it right-side in and sew the ends closed.


Now for the fun part! I pinned the large rectangle to one circle. I left an inch unpinned and pinned the two ends of the rectangle together. I sewed them together. Then, I finished pinning it to the circle and sewed it the same way I did the handle by following the existing stitch.


It was then time to sew on the handle.


After that, I pinned the whole thing to the second circle and sewed it together. I left an opening several inches wide. Stuffed her with fiberfill. I used 36 oz. because I wanted them super lofty.


The last step was to hand stitch the opening and voila!


Audrey lives her new cushion and I'm sure Will will like his one day, too!


Pin It

Monday, June 18, 2012

Disney World: Where All Your Dreams Come True


We just returned from a wonderful trip to Disney. I can now officially say that we survived Disney World with a 4-year-old and a 2-month-old. I admit that I was very nervous about going with the baby but he did really well. I thought I would share some tips and products that we used that kept things going smoothly along the way.

Packing
I decided not to use typical suitcases for the kids and instead packed all of their things in these Thirty One bags.


They are so roomy and easy to carry plus I wanted Audrey to be able access all of her things on her own. She is quite the independent little lady these days and always wants to pick out her own outfits, which leads me to my first tip. I put an outfit complete with socks, underwear, and hair accessories in a plastic bag.


That way, she could pick each day what she wanted to wear and I didn't have to worry about her picking something mismatched or just not appropriate for the weather. I got this idea from Pinterest and this blog. It worked really well.

Getting There
We live in Ohio so getting to Orlando by car takes about 14 hours. This was not something I wanted to do with an infant who nurses every 2-3 hours. That would mean that we would have to stop at least six times for a half-hour each time. Not something I was willing to do. At the same time, traveling by air with all of our stuff would have cost a fortune. So, this is what we ended up doing...I flew with the kids and my husband and his dad drove taking all of our junk with them. We didn't have to check any bags at the airport and they were able to drive without all of the chaos that ensues with two young children.

Nursing
One of my concerns about taking Will to Disney was how often he needs to eat. I am not usually one to breastfeed in public but I had to quickly get over my insecurities. My absolute lifesaver was my nursing cover.

 I usually tried to find a place with air-conditioning or a secluded, shaded bench. All the Disney parks have Baby Care Centers that I used whenever we were close enough to them. All in all, Will stayed satisfied and I welcomed the opportunities to sit down and take a break.

Keeping Cool
The hot, muggy Florida weather was another concern. We wanted to keep both kids cool and happy. These two products that I picked up at Babies R Us were absolute lifesavers for Will.


 The fan (Diono stroller fan) attached to his baby carrier so he always had a constant breeze. Be sure to bring extra batteries and a mini screwdriver along with you because you will need to change them. The sun shade (Summer infant ray shade) was great also because it extended the shade on our stroller and it provided UVA/UVB protection. Babies under 6 months aren't supposed to wear sunscreen but his doctor did okay us applying a little to his feet when they were sticking out.

As for Audrey, we were definitely OCD about sunscreen. We reapplied it every two hours and used an SPF 90. We also got her a spray fan like this one, which she loved.


Thoughts about the Parks
There are so many options when it comes to visiting Disney World. There are four different parks and a water park. You can buy tickets for multiple days and choose options like the Hopper. We weren't exactly sure how many days we wanted to go but we ultimately decided on four days with the hopper option, which lets you visit more than one park in a day.

We went into this trip with the realization that Audrey wouldn't remember every detail about it; therefore, we weren't stressed about seeing everything. We figured we would go back when she was older anyways. This mindset let us take our time and go with the flow.

Here's how it all went down...

Magic Kingdom on Monday for fifteen hours straight, open to close. We managed to cover about 75% of the park and we stayed to watch the electrical parade and fireworks at the end of the night, which were amazing!

Animal Kingdom on Tuesday for half the day. We did a safari and a few other things but didn't stay long. We were all a little worn out from the day before.

Hollywood Studios on Thursday for most of the day. This park consists mainly of shows so it was nice to sit back and relax. Plus, most of the shows were in air conditioning, which was a huge plus.

Friday we had reservations to eat breakfast with the princesses (booked several months in advance) at Magic Kingdom. It was definitely "magical" and Audrey had a wonderful time. From there, we did some things that we had missed on Monday and stayed until early evening.

So, we decided not to visit Epcot this time around since we heard that it doesn't have much for the little ones. We also didn't use the Hopper since we were always so exhausted by the time we were done at a park. I think if I had older kids it might be a good idea.

When doing the rides we used FastPasses as much as we could. You get a special ticket with a time frame to return to the ride. You then get in a special line with very little wait. You need your admission ticket to get a FastPass and once you have one, you can't get another for two hours.

Audrey's favorite thing, by far, was meeting the characters. She is at the perfect age where she isn't afraid of them and believes they are the real deal. Doing something like the princess breakfast or a meal at Chef Mickey is the best way to meet several characters at once.

Finally, I downloaded an app on my iPhone that was a great resource. It has a map with GPS of all of the parks, character meeting times, event times, wait time for rides, etc. It is called Disney Parks and it was free!

We stayed a week in Orlando so we only had a couple "off" days. It was a wonderful time with the kids but I could definitely use a vacation from my vacation.  : ) Pin It
Related Posts Plugin for WordPress, Blogger...