Saturday, December 29, 2012

Lighting Roundup

If you have been a reader since last summer, you may be familiar with my mission to find stylish lighting fixtures for the new home we're building. You can read more about it here. It has been incredibily difficult to choose items for our entire house. I just hate making decisions and this involved a lot of decision making. At first, I was very hung up on keeping everything in the same color family, such as, brushed nickel. Then, I decided that if I loved something I needed to just go with it. Sometimes what I loved was oil rubbed bronze or other darker metal so you will notice a mixture of those two colors. The overall look seems to be a good mix of industrial modern with some vintage glam mixed in. So, here is everything and my price breakdown. The builder gave us a $2500 allowance for all of our fixtures so let's see how I did!
 
Lighting Finds
polyvore.com

 
1. Ikea Kristaller Chandelier - $40 - powder room
2. Antique Copper Lantern - $150 - above the basement stairs
3. West Elm Capiz Pendant - $110 (on sale) - master bedroom
4. Ikea globe light - $10 - pantry and kid's bathroom (2)
5. DIY inspiration for nursery from Etsy
6.Crystorama Solaris Chandelier - $208 (coupon) - foyer
7. Ikea Pendant (no longer online) - $10 - kid's bedroom hallways (2)
8. Urban Outfitters Honeycomb Pendant - $65 (on sale) - breakfast nook?
9. Ikea Melodi Pendant - $10 - master bathroom toilet room
10. West Elm Mercury Glass Pendant - $80 (on sale) - kitchen island (2) and master bedroom (1)
11. Ikea Pult Ceiling Light - $10 - closets (4) and laundry room (1)
12. Nuvo Vanity Light - $60 - master bathroom (2)
13. Wrought Iron Crystal Chandelier - $150 - dining room
14. Otis Designs Vanity Light - $130 - kid's bathroom
15. Ikea Maskros Pendant - $40 - girl's bedroom
 
And, my grand total is... $1,353! Yay! It's always nice to be under budget. Grant it I still have some exterior lights to purchase and some bulbs and other accessories will come out of our allowance but overall my mission was successfully accomplished! I can't believe that I've been talking about this since last summer. I think this house can go ahead and get done already!
 
If I haven't mentioned this yet, I love, love, love to read your comments and suggestions. Feel free to share your thoughts anytime. Thank you, as always, for reading!


Pin It

Thursday, December 27, 2012

DIY Instagram Canvas

Is there a way to buy canvases in bulk? I feel like I am constantly buying them for one thing or another. For Christmas this year, I included them with some paints and oil pastels as gifts. I, also, used them for a couple of DIY projects. The project that I'm sharing today was for my daughter, Audrey. How sweet is it that one of the things on her Christmas list was a picture of her and her baby brother? I have been in love with this Instagram photo that I took of them in the hospital when Audrey first held Will so I decided it was the perfect choice for Will's gift to her.


I had an 8x8 print of the photo made using my Postal Pix app on my iPhone. I also purchased an 8x8 canvas. I used charcoal craft paint to paint the edges of the canvas. I then trimmed the photo a bit because it had a white border and I liked the look of it without.


I used matte Mod Podge to attach the photo and I put a coat on top to seal it. I was nervous about putting Mod Podge on a glossy photo but it turned out fine. I often wonder, though, if a spray sealer would give me a better result. I might have to try that out some time. Audrey loves her picture and it was an easy and inexpensive way to create a photo canvas. She is so excited to proudly display it in her bedroom. She is an amazing big sister and this photo truly captures how much she loves her little brother.
Pin It

Friday, December 21, 2012

Hello Kitty Pajama Party Part 2

As promised, I'm back to share a few more details of my little lady's 5th birthday party. The party was a huge success and I'm pretty sure both Audrey and all of her guests had a blast! In my last post, I shared these DIY headbands and blankets that I made. They were definitely a huge hit. Just look at the birthday girl all decked out!

 
 It has become a bit of a tradition for us to have an ornament craft  at Audrey's parties since her birthday is only ten days before Christmas. So, I figured out a plan to make Hello Kitty ornaments. This project cost practically nothing since I had pretty much everything on hand. All I had to do was buy the cookie cutter. Amazing!


I followed this recipe for making salt dough ornaments.I painted each one with white acrylic paint (about 3 coats) and I used a black sharpie to outline her bow since it got a little lost in the mix. Since I wanted this project to work for girls and boys, I printed out this sheet in case the kids needed a little inspiration.


And, here are some of the finished products. They look amazing and the kids had a lot of fun painting them.
 
Here is the one that Audrey made! I love that it will serve as a memory of her turning five each year that we put it on our tree.  
 
 
We also had a station for the kids to make Fruit Loop necklaces. I used yarn but realized as the kids were working on them that adding a piece of tape to the end made it easier for them to string the cereal.
 
 
And, what's a birthday party without cake? A must for me when it comes to parties is making the cake myself. I'm not always the best at it but I enjoy it.  I used the Wilton Hello Kitty cake pan. I also made a large round cake to serve as a base and because I wanted to make sure we had enough. Here is my handiwork. Again, not perfect, but it was made with love.
 
 
This isn't the best picture but here is a shot of the entire cake table with some then and now pictures of Audrey and favors. I made the banner out of scrapbook paper and ribbon.

 
Happy Birthday to my sweet little girl!


**In case I don't manage another post before next week, I want to say Merry Christmas! Thank you for reading and I will see you again next year! **


Pin It

Tuesday, December 18, 2012

Secret Santa Gift Ideas

**I know I promised to share a few more details of Audrey's Hello Kitty birthday party that took place over the weekend. Unfortunately, I don't have access to all my pics right now so I'll have to keep you in suspense for a couple more days.**

Until then, allow me to share my gift ideas for our annual Secret Santa gift exchange that we do at school. It is always so much fun and this year has been no exception. We exchange three small gifts and  one larger gift on the last day. The idea is to keep the smaller gifts under $5.00, which isn't always easy. So, I thought I'd share what I came up with this year just in case you're in need of some inexpensive ideas for a friend, a co-worker, babysitter, volunteer, teacher, bus driver, or anyone else on your shopping list.

I began Secret Santa week by giving this lantern from Ikea filled with red tea lights. It has such a festive feel to it but it can definitely be used throughout the year.

ROTERA Lantern for tealight IKEA Suitable for both indoor and outdoor use.
My next gift was a cute glass magnet set that I found at Home Goods and I wrapped in a holiday hand towel. I didn't snap a picture of them but they looked something like this. I know I would love to hang them on my fridge!
 
glass pebble magnets
 
For my third gift, I decided to get my craft on. I happen to be a little obsessed with making coaster sets. They are soooo easy to make and they turn out really cute. In the past, I've made them for Audrey's teachers and as hostess gifts. I found the tiles for about 20 cents a piece at our local Habitat for Humanity Restore. Then, I just purchased some scrapbook paper and used Mod Podge to adhere the paper to the tiles. I added some felt pads to the back to give it a finished feel and tied them together with a bow.
 
 
Last but not least, I found this adorable dragon tree and pot from Ikea (my go-to spot for fun gifts for sure). My person indicated that she has a thing for dachshunds so I decided to personalize the pot a little by adding a  dachshund silhouette. I simply printed off a picture from Google Images and mod podged it on. I rounded it off with a gift card to TJ Maxx because who doesn't love to shop at TJ Maxx?  


And, there you have it! A few inexpensive gift ideas that you still have time to give. Now to figure out what to get everybody else on my shopping list this year. Happy gifting!
Pin It

Wednesday, December 12, 2012

Hello Kitty Pajama Party

I missed my usual post yesterday because I've been busy preparing for my little girl's 5th birthday! I can't believe she's going to be five. For some reason this year seems like a huge milestone compared to other years. It literally seems like yesterday that we brought this adorable little baby home. She has grown so much and we love her more than words can say. I'm in awe everyday of how amazing and smart she is and how lucky we are to have our Audrey. ( I need to stop before I start crying.)

 
To celebrate the special occasion we will be having a Hello Kitty Pajama Party (her choice, of course). This is very fitting because my daughter loves to wear her pjs. Usually it's the first thing that she puts on when she gets home from school. She is definitely a girl after my own heart. So, my challenge was to merge these two ideas into one unforgettable celebration.
 
Here is a sneak peak of some of the things that I have planned...
 
Get Kittyfied
 
Audrey and her guests will adorn themselves with Hello Kitty headbands and tattoos and will have their picture taken behind a large, empty frame. For the boys, I have created tiger headbands. These were so simple and inexpensive to make. I simply followed this tutorial from Sunny by Design. 
 
A little tracing...


Cutting...


Gluing...
 
 
 And voila! Cute, huh?


Bedtime Stories 
 
What's a pajama party without a bedtime story? Each child will snuggle up with their very own blanket to listen to a story. Then, they will get to pick a book from a basket to enjoy at home. Of course, I had to find some Hello Kitty books. I threw in a few other titles, also, that I thought the boys would like or just in case the girls weren't feeling the Hello Kitty ones. 


The blankets were super easy to make, as well. My original plan was to get some fleece at the fabric store but I struggled to find any that was less than $6 a yard. I was not willing to spend that much. Then, I just so happened to stumble upon these blankets at Ikea.


They were perfect and the price was right at $4.00 each. They were big enough that I was able to cut them in half. I loved the idea of personalizing them with each child's inital. Here are the steps that I followed based on this tutorial from A Small Snippet.
 
 
I printed out each child's initial, cut them out, and pinned them to white felt.


I cut, again, and then used iron-on adhesive to make them stick to the blankets. You iron it to the letter first, peel off the paper, and iron it to the blanket.


Here are the finished products all set and ready to go.


This is what I have done, so far! I will back to share more later this week. Have a wonderful Wednesday!
Pin It

Thursday, December 6, 2012

A Van Gogh Community Art Project

This amazing idea was the brain-child of my sweet friend and colleague, Ashley. She is always my go-to person when it comes to great art projects for my students. With art class being non-existent for Kindergartners in our district, we find it our responsibility to support students in their artistic development. This is our Van Gogh project and how it all went down...

We first chose four Van Gogh pieces to use. I chose "Starry Night Over the Rhone" and "The Mulberry Tree" and Ashley's class did "Starry Night" and "Sunflowers".

First, we printed out the artwork and drew equal lines to form a grid on the back. We added a letter/number code to each square.


We then, cut white paper into 4x4 squares and put the same letter/number code on the back of them. Each child was responsible for recreating a small square piece of the overall painting using oil pastels. The code allowed us to put the piece back together in the correct order.


Are you ready for the final product? We are very excited about how they turned out and our students are very proud of the work that they did.  

"Sunflowers"


"Starry Night"


"The Mulberry Tree"


"Starry Night Over the Rhone"


Pin It

Tuesday, December 4, 2012

Advent Calendar

I guess I'm a couple of days behind with this post but I thought I would share the advent calendar that we put together this year. We love Christmas around here and counting down the days is always very exciting for us. Because not only does it mean that Santa is coming, it also means that we get to spend more time together as a family.

I decided on a tree theme for our calendar and began by gathering a few supplies, such as, twine, festive scrapbook paper, and clothespins.

 
I cut the twine into strips and nailed them to the wall. Obviously, I'm not worried about putting a bunch of nail holes in the wall. If you are concerned about that you could always attach it to a separate board or just use tape or 3M hooks.
 
 
Then, I cut the scrapbook paper into different shapes and hung each piece on clothespins to serve as the ornaments.


Starting at the bottom, I wrote the number for each day of December up to the 24th.

 
I wanted something special for Christmas Day so I had Audrey paint this star onto a square canvas that I happened to have on hand. The scale is a little off but Audrey is very proud of her star and I really like it, too.

 
On the back of each number there is a special event or activity written. Each day, we turn the day over and then we turn it back the following day.
 
 
 I wanted to incorporate a variety of things to do as we countdown to Christmas. I haven't planned out all 24 days because it's hard to be tied to things around here. So, I am adding some things as we go. So far, our list includes things, such as:
  • Have breakfast with Santa
  • Make a Christmas wish list
  • Find Santa's elf hiding in the house
  • Read a Christmas bedtime story
  • Make a shopping list for people we want to buy gifts for
  • Celebrate Audrey's birthday
  • Get a Christmas tree and decorate
  • Deliver meals to a needy family
  • Donate things to the giving tree
  • Bake Christmas goodies
  • Christmas movie night
  • Go on a drive to look at lights
  • Go ice skating
 We are really enjoying our Advent tree! Audrey is excited because she is ready to make it to the star and enjoy her favorite day of the year. Our countdown has officially begun!

What are some of  your favorite traditions leading up to Christmas? Do you have any great ideas that I should add to our list?


Pin It

Thursday, November 29, 2012

Pre-Holiday Sprucing

Originally, we were supposed to be moving into our new home last week. I always said that I would believe it when it happened and, well, it's not happening. So, I've had to come to terms with that and that we will be celebrating another Christmas in our current home. I honestly can't  complain because I know we are blessed and I've decided I just need to make the best of it.

When it comes to keeping this place organized and orderly I have gotten into this habit of saying things like, "We won't be here much longer." Or, "What's the point?" Our house was beginning to feel like a storage facility rather than a home. That was just not working for any of us. I have found that my mood is directly related to the condition that my home is in. If the place is a mess, I'm a mess! So, rather than just "existing" here for the next couple of months (or however long the house takes to be completed) I decided a little sprucing up was in order. Besides, we are all going to be spending more time at home over Christmas break and we will be having more company so why not spend it in a place that feels a little more homey and inviting.

I didn't take any "before" pictures but here is a list of concerns that I was having:

  • Baby items had overtaken the playroom/office
  • Audrey was out of storage room for toys, games, etc.
  • Will didn't  have a designated play space
  • DIY art projects that I had completed were just setting on the floor propped against our bookshelves.
  • Our office items and bookshelves had become cluttered and disorganized.
  • I had no idea where we would put a Christmas tree!

So, for the past several weeks I have made it my goal to address these concerns and I must say I've made a good amount of progress. The first thing that I did was pack up unused clothing, office stuff, toys, and baby gear and took them to my in-laws' to store away or I donated things I knew we wouldn't use in the new place.

Then, one night around 11:00 PM I got this sudden urge to rearrange some furniture. I knew that I wouldn't be able to sleep thinking about it so I just went to work. Does that ever happen to you or am I just crazy? Here is the setup that I came up with in our playroom/office...

 
The larger bookshelf used to hold our office stuff and books but now, it mostly consists of Audrey's toys, some of her books, and just a few of my books on top. I'm in love with my little stack of home books that I have started collecting.
 
 
The smaller bookshelf became storage for files, craft supplies, and other miscellaneous stuff. I also borrowed a table from our living room for the little TV. I don't love having a TV in the playroom but it is nice, at times, for letting Audrey watch her videos.
 
To give you an idea of how cramped we are in this place, let me show you the other side of this room.
 

Yep, that is Will's changing table. Will and Audrey share a tiny bedroom that doesn't have a closet so this was the only place to put the changing table. To make it feel slightly tucked away, I added the curtains. Oh, and by the way, this is where we usually put our Christmas tree.

My next step was to create a play space for Will. A struggle of having children that are four years apart is that Audrey's toys are completely unsafe for Will. She has so many things with small parts that he can't get into. So, I decided the safest place for him to play would be in the living room. I was completely inspired by my friend Liz's space for her little girl.

Image from My Life in Projects

Here is Will's nook...

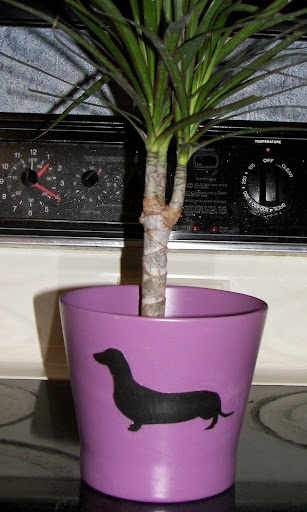
Rug on clearance at Target, mirrors from Ikea, wooden letter that I painted,
 silhouette art that I DIYed here, and everything else I had on hand.


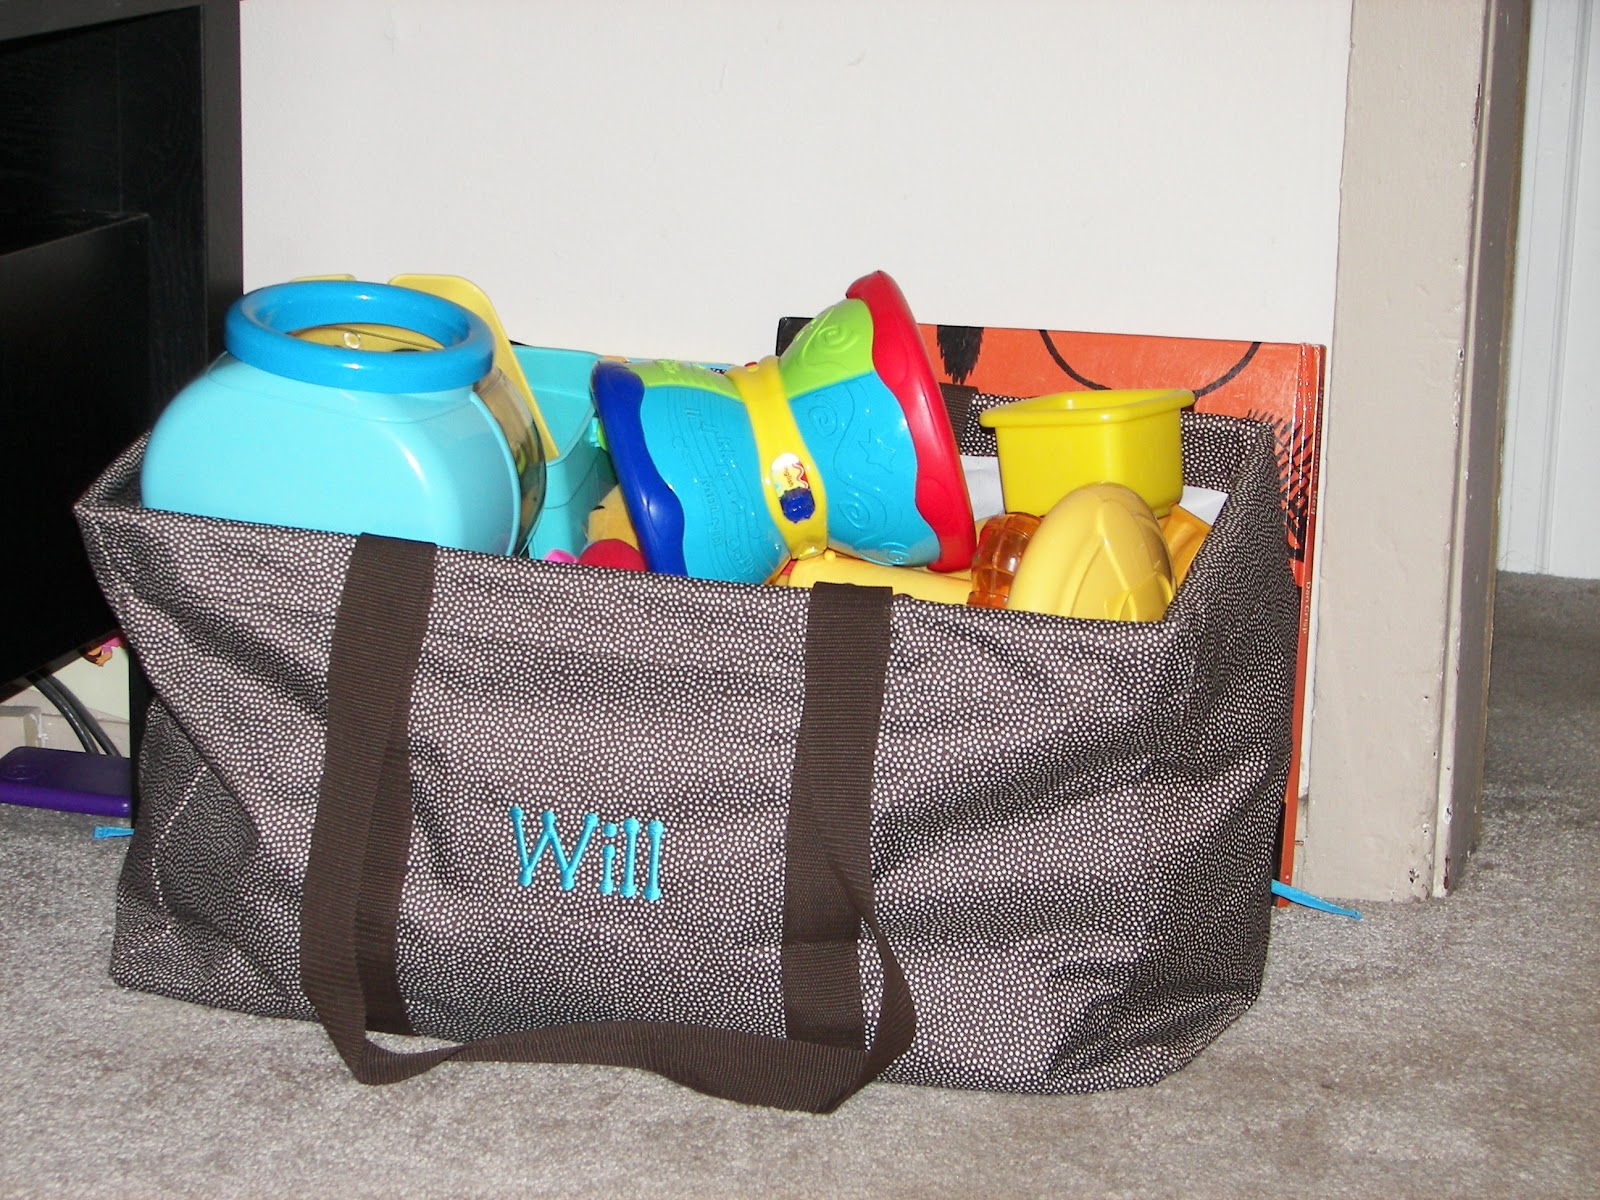
The rest of Will's toys are contained in the living room in this large utility tote from Thirty One.


Once Will had a special place to play; it was only fair that I give Audrey a little space of her own, too. Her little nook is more for relaxing and reading.
 
I wanted the bench to double as a seat so I added a comfy pillow. I just picked up an inexpensive pillow cover from Hobby Lobby and covered a pillow that I already had. The white boxes hold Audrey's princess dolls that go with her castle (do you see it on the right?). The boxes needed to be up off the ground and out of Will's reach.
 
The butterfly art is from Ikea and we DIYed the other two pieces. I gave Audrey a notebook for writing and drawing and she added her self-portrait to the cover.

I picked up this little tray at Hobby Lobby. I will probably paint it one day but thought the natural wood was cute, too. The tray holds writing/coloring supplies, some sight word finders that I made out of paint samples, and a little decorative bird.

That is what I have accomplished, so far! Oh, wait, I also hung this art piece that I gave Aaron for our anniversary. It is now at home in the playroom..


And,  one more thing! My plan is to get a small Christmas tree and put it between our two couches after I move out a few things that are tucked away back there. Is that weird? It's the best plan that I have right now.

 
Thank you so much for stopping by today! So, how about you? Have you done any sprucing up, lately, just in time for the holidays?

Pin It
Related Posts Plugin for WordPress, Blogger...