Showing posts with label stylin'. Show all posts

Wednesday, February 27, 2013

Pinterest Challenge: Nail Art Edition

Image via Young House Love
 
It's that time again...it's Pinterest Challenge time! Hosted by Sherry of Young House Love, Katie of Bower Power, Megan from The Remodeled Life, and Michelle from Decor & The Dog in an effort to stop pinning and start doing. This marks my third time participating in the Pinterest Challenge! Looking back at my old projects I always seem to whip up something girly. I've done a bow clutch, a hair accessory organizer, and this go around I decided to try my hand (pun intended) at some nail art. My instinct is to write a disclaimer here (you know, about my DIY manicure shortcomings) but I won't.
 
Let me first share my Pinspiration. I found several beautiful and awesome nail ideas. My goal was to just do a little experimenting and maybe discover a new technique for doin' my nails at home. I thought this was very chic and looked very simple to do.
 
Pinned Image
No link available. Sorry! : (
 
I loved all of the ideas below and you'll see glimpses of that pinky idea in the looks that I did.


Pinned Image
Image via The  Berry (click on picture to follow the link)
 
These map nails are SUPER COOL! I didn't get to try it out but I will definitely have to do so very soon.  
 
Pinned Image
Image via Need Supply Co. (click on picture to follow link) 
 
For my first attempt at some at-home nail art, I used the following colors: Loreal After Dark (navy), Loreal Not a Cloud in Sight (turquoise), and Nicole by OPI in The Next CEO (gold).


I used the navy as my main color, added one finger of turquoise for a pop of color and applied some gold triangles to the navy. To add the triangles, I taped them off with mailing labels  that I cut up like so...


 This is what the final product looked like. Thank you Instagram for being so forgiving because my manicure skills left much to be desired. I always end up with polish all over the place! So, I wore this around for a day and decided it wasn't my favorite look.
 
 
 I decided to lighten things up by using white polish and the same turquoise and gold color as before. I started with this...


Then, I added the little triangle detail and tried out the gold stone technique like my first inspiration piece showed with a piece of plastic wrap. I simply added a little gold polish to my ball of plastic wrap and dabbed it over the white nails.


So, my little DIY manicure was fun because I learned some new ways to add interest to my nails. On the other hand, I also came to the conclusion that...
A. I need longer nails
and
B.  I need some professional intervention to clean up my dry cuticles.
I think I"ll be gettin' on the sooner than later!
Do you have any nail wisdom to pass along to me?
 Any fave products to deal with dry cuticles?
 
Thanks for stopping by and don't forget to head over to Young House Love to see all of the amazing projects out there. You gotta love Pinterest Challenge day!


Pin It

Thursday, February 7, 2013

DIY Statement Necklace

It has been a crafty few days for me as I've been busy using thrift store ties to make some DIY jewelry. Last weekend, I shared this little gem that I made. In keeping with the same theme, I am back to share a necklace that I also made out of a tie. I have been wanting to add a couple of shorter statement necklaces to my wardrobe. I noticed that most of my larger necklaces are longer and beaded and that doesn't always go well with a little boy who thinks everything is his play thing.
 
After some Pinterest perusing, I landed on these adorable necklaces and a great tutorial to go along with them. This blog, Artstar by Aletha, has a lot of amazing jewelry tutorials. I have a feeling I will be visiting often.

image via Artstar by Aletha

This one required the sewing machine. So I drug her out of the closet, blew off a little dust, and set her up. Can I just tell you how excited I was that I was able to thread the bobbin from start to finish without any issues? I didn't have to look in the owner's manual one time! It looks like we have turned a corner in our relationship. You might even consider us "friends" at this point. I chose to use this navy tie with teal stripes.


To kick off this little project, I had to completely disassemble the tie. I took out all of the stitching in the center of the tie and took out the insides. This is what it looked like when I was done with that step.


The next thing that I did was press it and then trim it so that the entire tie from one end to another was about 3.5 inches wide.
 
 
Next, I folded it over so that the right sides were together and I pinned it.
 
 
Then I began sewing. The tutorial explained to leave a 2-inch opening about every 3-inches or so. This was so that I would have room to add the beads. Oh, yeah, the beads! Somehow I didn't take pictures of them. This project requires several round beads. I had eight wooden beads on hand and they worked perfectly.
 
 
Once the sewing was complete, I turned the entire thing inside-out and pressed it flat on the seam. It looked like this.
 
 
All that was left to do now, was to slip beads into the openings and tie knots. It sounded easy enough but for some reason this took me a while. It took a lot of playing around to figure it out and get it to look symmetrical. I also couldn't get my knots to look as tight as my inspiration piece. I wonder if the tie I used was a little thicker. Since my hands were a little busy at this point, I didn't even think about taking pictures. Hopefully, you can see how I did it by looking at my finished piece.
 
And here she is (posing in a few different places)...


I am sooooo excited to wear it! I think it will be a very versatile piece. Something that can easily be dressed up or down. I also love that I made this for a mere 75 cents! What do you think? Is this something that you would wear? Thanks for stopping by and have a Happy Thursday!


Pin It

Saturday, February 2, 2013

Refashioned Necktie Bracelet


It has been a lazy Saturday here in our little corner of the world. With fresh snow on the ground and a sick baby, I knew that we wouldn't be venturing out. I decided I might as well attempt to create something out of one of my thrift shop spoils from the YHL Thrift Shop Challenge. If you haven't seen my post on that, you can find it here. One of my finds was this lovely group of men's ties.

 
I picked them up not knowing exactly what I would do with them. Just like any other time when I'm looking for a DIY project to try, I hit up Pinterest for a little inspiration. I immediately found some amazing ideas for turning men's neckties into jewelry. I ultimately decided to get my craft on and make one (or two) of these bad boys. Thank you Linda Eve for the perfect tutorial.
 
I chose to use these ties that I picked up for 75 cents each. I decided to use the gray tie for myself and and pink tie for my daughter, Audrey. I will share my steps but the above tutorial is definitely a little more detailed.

 
Audrey was helping me document...
 
 
I started by measuring the skinny end of the tie around our wrists to get the right size. Then, I simply cut it off.
 

The next step is to take an empty plastic, yogurt container and cut a strip out of it to go inside of the tie. It slid right in.


Then you fold over the fabric on the end and hand stitch it in place. Let me just say that hand-sewing is not my strength. The tutorial talked about a blind stitch and I had no idea what that was. I just did my best and rolled with it. I don't think I'll quit my day job anytime soon to become a full-time seamstress.
 
 
I was definitely in deep concentration when I was sewing. Audrey thought it was a good time to capture another picture of me. She was cracking me up!
 
Side note: Another thing that had me laughing was that while I was sewing this one, my hubby came in and was concerned that I was using one of his ties. I said, "Do you really think you would own a pink tie?" He said, "I don't see why not. I would call that more salmon than pink, anyways." Say what? Wow, you think you know a person after thirteen years and something like that falls out of his mouth. Too funny!
 
 
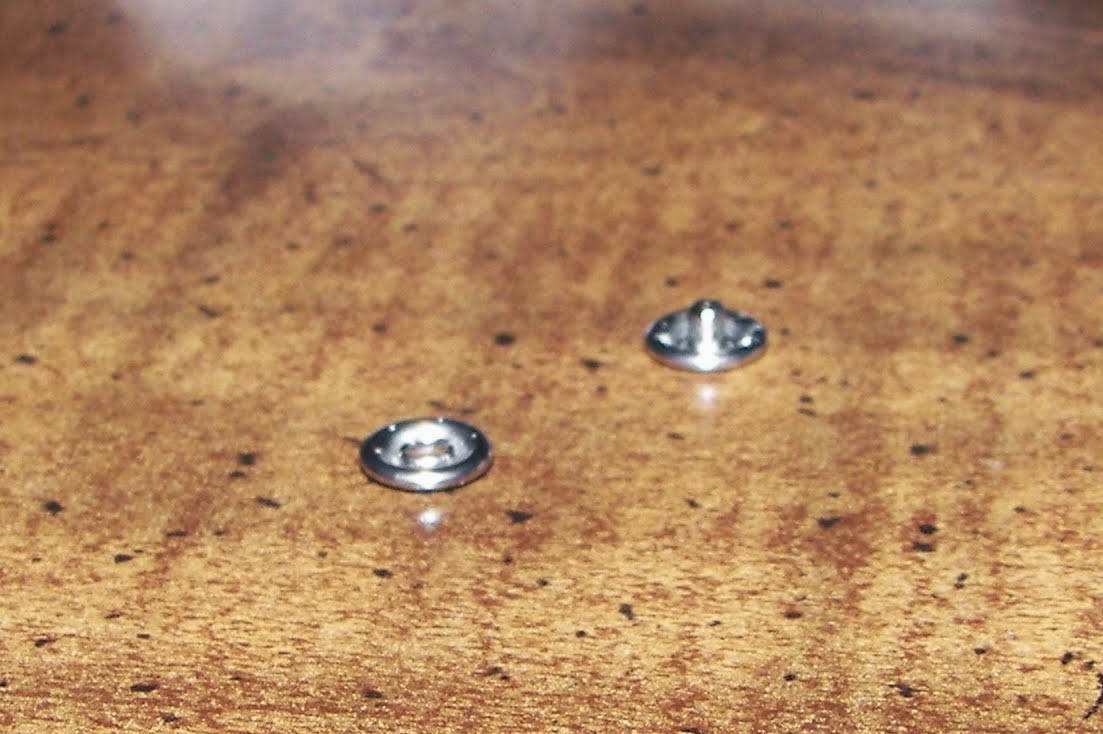
It was then time to add snaps. Unfortunately, I didn't have any sew-in snaps on hand. I came up with this plan to use snaps from one of Will's onesies that he had outgrown and glue them on with craft glue. It worked but I'm not sure the snaps will stay in place with repeated use. I will probably still pick up some to sew in the next time that I'm out.
 
 
Last but not least, I sewed on a couple of decorative buttons and started snapping pics of our finished bracelets.


I have a couple more plans for my thrift store ties and will be back to share those in the near future. Have any of you made over something that you found at a thrift store? Have you ever attempted to refashion something into a whole new piece with a whole new function? Thanks for stopping by! 


Pin It

Thursday, August 9, 2012

Outdoor Summer Wedding

A couple of weekends ago, Aaron and I attended a family wedding. I wasn't about to buy something new for one night so I decided to "shop" around in my closet to see what I could find. I came across this Lauren Conrad dress that I haven't worn in a while. I wore it to a Fall wedding in the past with a grey belt and a taupe cardigan. I was so happy that it still fit post-baby and decided I could wear it and just style it a little differently for being outdoors in late July.


I started with this necklace by Jessica Simpson. It's understated but still adds a little color to the neutral look.


I kept the look a little more casual (appropriate for the style of the wedding) with these sandals and this belt. Plus, the sandals have a good substantial heel so I didn't have to worry about sinking into the ground. Hate it when that happens!


Once I put all of that together, I decided it still needed a bit more color so I grabbed these accessories. A Jewelmint beaded bracelet, my go-to summer green clutch, gold bangles, gold earrings, and last but not least; some retro shades from Target.


I didn't have to spend a dime but it felt like I was wearing a brand new outfit.
Pin It

Saturday, July 21, 2012

Girl's Night

Last night I went out with my aunts and cousins for a girl's night. It has been forever since I've been out. Actually, this is my first girl's night since Will was born. So, yes, I was super excited to catch up with the ladies but I was equally excited to put on a pair of heels for a change.

I chose to wear this dress from Gap Outlet. I like this dress because it's casual enough for day-to-day but can also be dressed up for a night out. Plus, the color is so fun for summer.


Speaking of heels, I wore these Mossimo sandals from Target. The neutral complements the bright coral dress really well.


To polish my look, I'm wearing my new Anthropologie necklace, these vintage bracelets that were my grandma's, and this pair of gold flower earrings from Lauren Conrad's line.


Finally, I decided to carry my green clutch that I recently made.


I think pairing two bright colors is a bit risky but I thought I would "make it work". (Any Project Runway fans out there?)

So, you may be wondering what the girls and I did. We went to a local art gallery for some wine and painting. Here is Ann and I looking fab in our aprons. I put together a cute outfit and had to cover it up with this gorgeous frock. Haha! I wish I would have taken more pics. I guess I was too busy being an artist.


And...drum roll please...here is my masterpiece! When Audrey first saw it she gasped. She was thoroughly impressed with my artistic ability. She asked me if I had painted it for her and, of course, I told her yes. Then, she asked me why I put wine in her painting. Made me giggle!

Pin It

Wednesday, July 11, 2012

Covered Button Earrings

This is the second DIY accessory that I am attempting this week. If you have ever wondered what to do with those leftover scraps of fabric, this post is for you. I was inspired to make these when I saw them for sale at a local coffee shop. They were so adorable and I was very tempted to buy. However, I decided to wait and see if I could make them myself. Thanks to Fabric Envy and this awesome video tutorial, I knew exactly what to do. Let's begin with a list of materials:

1. Cover buttons with tool (I found mine at Hobby Lobby. They come in different sizes.)
2. E6000 craft glue
3. Pliers
4. Earring posts
5. Fabric scraps
6. Scissors


You may recognize the fabric from my floor cushion post. First, I took the hook out of the button back with pliers.


Next, I chose a small portion of the fabric to use and placed the button top over it. I placed it in the mold fabric side down.


Then, I trimmed the fabric around the mold with scissors and pushed the fabric into the mold.


I put the back of the button on top if the fabric and used the tool to secure it.


Now, all that was left to do was remove the button and attach the earring to the back with glue. And there you have it!


Here are the two sets that I made.


I like these earrings because they are an easy way to add a little interest to any outfit. Another very inexpensive way to look fab!

Pin It
Related Posts Plugin for WordPress, Blogger...